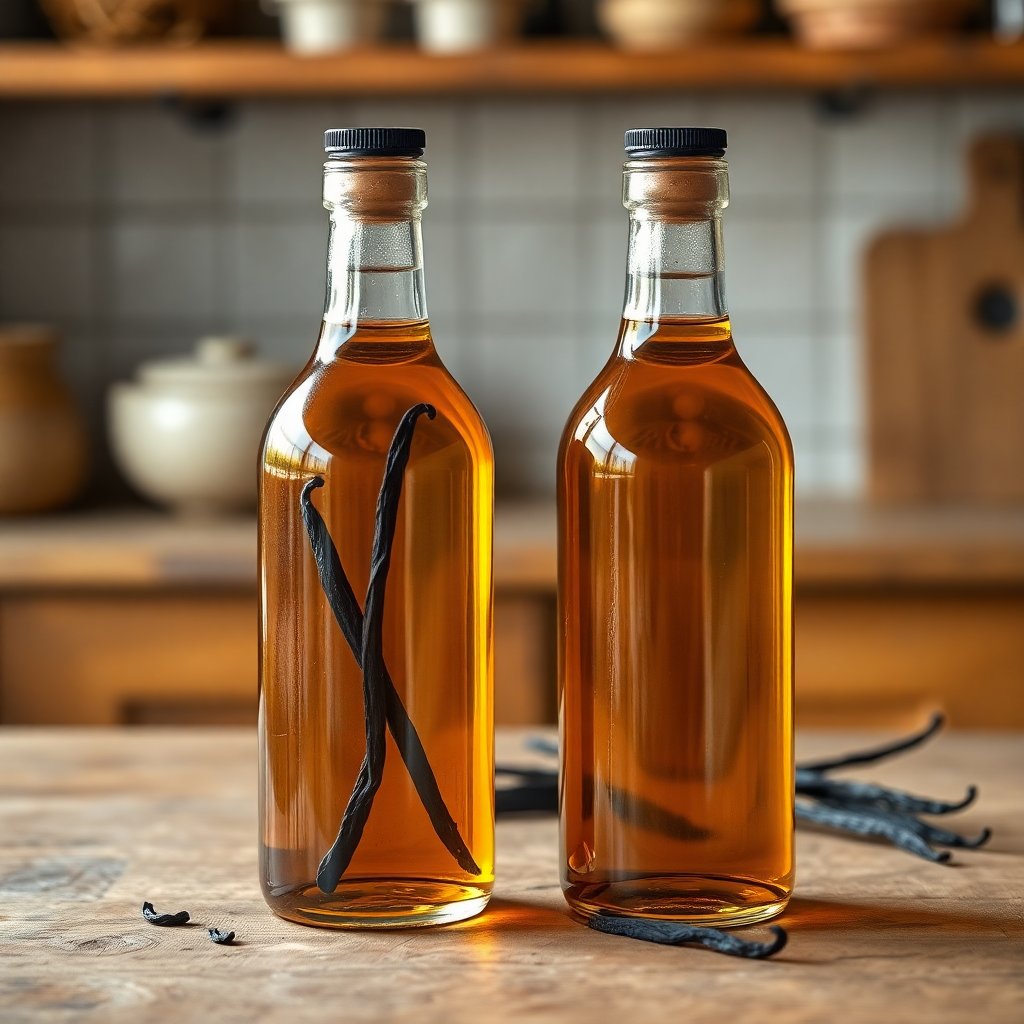
Walk down the baking aisle in October and the price tags tell the whole story: a small bottle of real vanilla extract costs more than most spices on the shelf, and the cheap alternative next to it is usually imitation flavoring built from synthetic vanillin. There is a better path, and it is almost absurdly simple. Real vanilla extract is nothing more than whole vanilla beans steeped in alcohol until the flavor and color draw out, and making it yourself costs a fraction of the store price while giving you something far better than anything in a supermarket bottle.
The timing could not be better. Start a batch now and it will be deep, dark, and fragrant right as holiday baking hits full swing, with enough left over to bottle into little jars as gifts that look and taste like you spent far more than you did. Here is everything you need to make it, wait it out, and keep it for years.
Why Make Your Own Instead of Buying It
The case starts with what is actually in the bottle. Commercial "vanilla flavor" is often imitation, built around synthetic vanillin derived from wood pulp or petrochemicals rather than the bean. Even genuine store extract is frequently thin, because the legal minimum is just that — a minimum. By United States standards, true single-fold vanilla extract must contain a set amount of vanilla bean matter per gallon and at least 35 percent alcohol, a standard of identity the FDA spells out in plain terms. Make your own and you can go well past that floor, packing in more beans for a richer, rounder flavor than most bottles deliver.
The money math is the kicker. Vanilla beans bought in bulk, especially by the half pound, bring the per-bottle cost down dramatically compared with buying finished extract. A single batch in a large jar can yield the equivalent of many small store bottles, and because you keep topping it up, one jar of beans and alcohol can quietly supply your kitchen for a year or more.
Then there is control. You pick the bean variety, the strength, and the base spirit, and you get a true whole-ingredient product with nothing added that you did not add yourself. For anyone building a real-ingredient pantry, homemade vanilla sits right alongside other from-scratch staples like making your own nut milk — a small act of patience that replaces a processed purchase with something better and cheaper.
Choosing Your Vanilla Beans
The bean is where flavor comes from, so this is the one place worth a little research. Three varieties cover almost everything a home cook wants:
- Madagascar (Bourbon) beans are the classic. Rich, creamy, and sweet, they are the flavor most people picture when they think of vanilla, and they are the safe default for baking.
- Tahitian beans lean floral and fruity, with cherry and anise notes. Lovely in custards, creams, and anything where vanilla is the star rather than the background.
- Mexican beans are bold and slightly spicy, with a woody warmth that plays well with chocolate and fall spices.
Buy whole beans that are still pliable, not dry and brittle — a good bean bends without snapping. Grade B beans, sometimes sold as "extract grade," are drier and less pretty than the plump Grade A beans sold for cooking, but they are cheaper and work beautifully for extract since you are not eating them whole. For a first batch, a half-pound bag of Grade B Madagascar beans is the sweet spot on price and flavor. → Shop whole vanilla beans for extract on Amazon
The Two-Ingredient Method
Here is the entire recipe: beans and alcohol. That is it.
Ingredients and ratio. A reliable starting point is roughly five to six whole beans for every cup of alcohol. More beans make a stronger, faster extract, so do not be shy — this is where homemade beats the store. For a standard batch, use a cup of 80-proof spirit and six beans.
Pick your alcohol. The spirit needs to be at least 80 proof, which is 40 percent alcohol, to extract properly and keep the finished product shelf stable. Vodka is the most popular choice because it is neutral and lets the vanilla speak for itself. Bourbon adds caramel warmth, rum brings a mellow sweetness, and brandy lends a deep fruitiness. Any of them works; vodka is the all-purpose default.
The steps:
- Split the beans lengthwise with a sharp knife, cutting most of the way down each pod to expose the thousands of tiny seeds inside without cutting the bean fully in two. A good knife matters here, the same way sharp tools pay off across every from-scratch project in the kitchen.
- Pack the beans into a clean glass jar or bottle. Bend or cut them so they sit fully below the liquid line.
- Pour the alcohol over the beans until they are completely submerged. Any bean sticking out above the surface can mold, so keep everything under the liquid.
- Seal tightly and shake. Label the jar with the date so you know when the batch started.
A wide-mouth jar with a solid lid is the easiest vessel to work in because you can fit the beans without forcing them and shake without leaks. → Shop glass jars with airtight lids on Amazon
The Hard Part: Waiting
Extraction is slow, and there is no real shortcut. The beans need time for the alcohol to pull out the flavor compounds and color, and the result keeps improving for months.
The timeline. You will see the alcohol start to darken within a week, but do not touch it yet. The extract is usable at around eight weeks, genuinely good at three to four months, and excellent at six months or more. If you start a batch in early October, it will be well into usable range by the holidays and superb by spring. The longer it sits, the deeper and smoother it gets.
Shake it now and then. Give the jar a swirl every week or two. It is not strictly required, but it keeps the beans moving and helps the extraction along. Keep the jar in a cool, dark cupboard — the same storage logic that protects every jar in a well-kept pantry, right alongside how you would stock and store whole spices so nothing fades before its time.
Do not strain out the beans. Leave them in. They keep working and the flavor only deepens. When you have used about half the liquid, top the jar back up with fresh alcohol and let it rest again. A single jar of beans will keep producing good extract through several refills before the pods finally give out.
Bottling for Gifts and Everyday Use
Once the extract is ready, decant what you need into smaller bottles for the counter or the gift pile. Small amber or clear glass bottles with a dropper or a narrow pour spout make measuring into a mixing bowl easy and clean, and a few vanilla beans tucked into each gift bottle look beautiful and keep enriching the extract on the recipient's shelf. A handwritten label with the bean variety and bottling date turns a fifty-cent bottle into something that reads as genuinely thoughtful. → Shop small glass bottles for homemade extract on Amazon
Storage is forgiving. Because the alcohol base is a natural preservative, homemade extract does not need refrigeration and effectively does not expire — it only gets better with age. Keep it in a cool, dark spot away from the stove and it will stay good for years. The one thing to avoid is heat and direct sunlight, which can dull the flavor over time.
Getting the Most from Your Extract
A few habits make homemade vanilla go further. Use the spent beans before you toss them: rinse and dry a used pod, then bury it in a jar of sugar to make vanilla sugar for baking and coffee, or steep it in warm plant milk for a custard base. Nothing has to go to waste.
Reach for your homemade extract anywhere a recipe calls for vanilla, and lean on it a little harder than store bottles since yours is likely stronger. It shines in baked goods, oatmeal, homemade granola, raw desserts, and sweetened drinks, and it pairs naturally with the kind of unrefined sweeteners covered in the natural sweeteners guide, where real vanilla rounds out maple, date, and coconut sugar beautifully.
A realistic expectation: the first batch asks for patience, but it is almost entirely hands-off. Twenty minutes of work now, a swirl every couple of weeks, and by the time the holidays arrive you will have better vanilla than money can easily buy at the store — plus a row of gift bottles that cost a fraction of what they look like they are worth.
This is a cooking and pantry guide, not health advice; the extract contains alcohol, so use ordinary judgment and talk to your doctor about any dietary or health concerns.
Affiliate disclosure: some links above are Amazon affiliate links, and purchases made through them may earn this site a small commission at no extra cost to you. That support helps keep these guides free.
As an Amazon Associate we earn from qualifying purchases. This article contains affiliate links; if you buy through them we may earn a small commission at no additional cost to you.